How to create a car skid effect in Fusion 2.5
In this tutorial we look at how you can create a ‘skid mark’ effect in Clickteam Fusion 2.5 for your car games.
It’s a relatively simple procedure and it has lots of room for customisation especially on the event you want it to happen. Let’s prepare the playarea…
Preparing the playarea
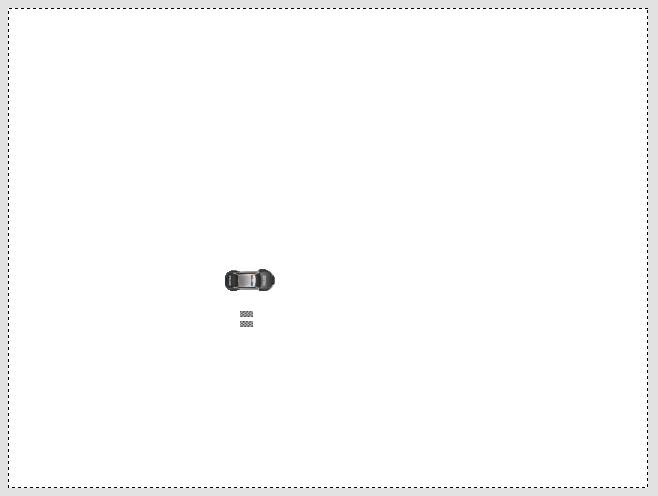
First of all, drop in your car object and a ‘skid’ active object. It should roughly align in size with your car tyres. It should be half the length of the car. As you can see in my example…
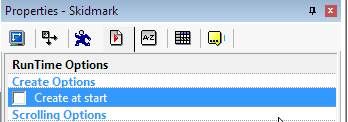
Now, ensure you uncheck ‘Create at Start’ for the skid active object…
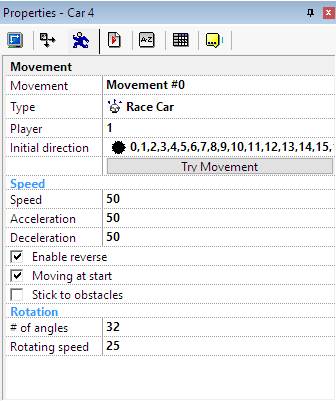
Now, select your car object, for the sake of this tutorial, we will give it the Racecar movement…
This is pretty much the playarea setup for this tutorial. Let’s jump into the Event Editor.
Clickteam Fusion 2.5 Events
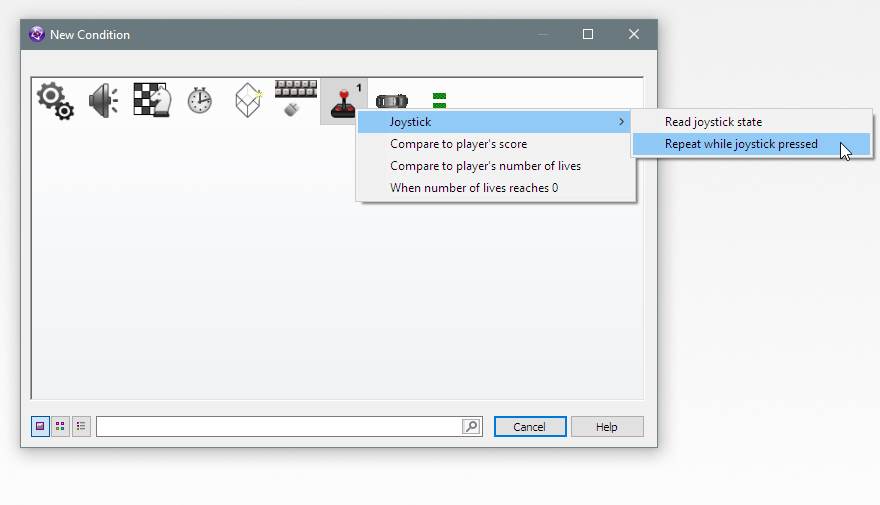
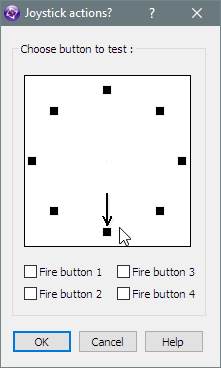
Once in the Event editor, we can literally perform this routine in one single event! So, let’s decide what conditions we want this skid mark effect to happen under. For the sake of this tutorial, we will go with when the user presses ‘down’ on the keyboard (in order to brake using the Racecar movement). So, in your first event, select the Joystick and then select Joystick > Repeat while joystick is presssed
When the dialog pops up, select the down direction, like so…
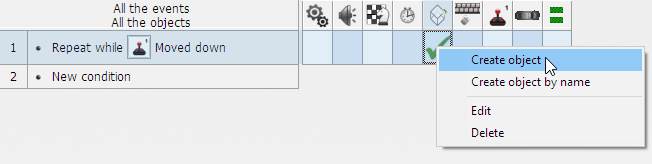
Click OK. You have now inserted the first event. Now we need to Create the skid object. So in this event line, right-click under the Create New Objects icon and select Create Object…
Select the Skid Mark active and click OK. When it shows the frame editor and asks where to create the object, click on the car…
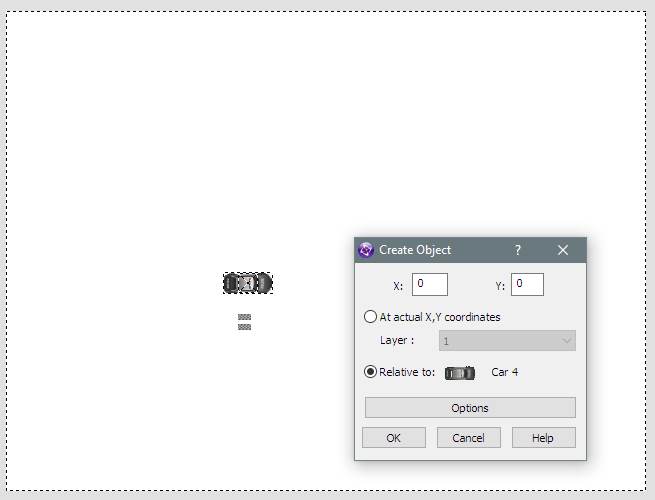
Once you have selected the car, ensure the co-ordinates are 0,0 and click OK.
Now that we have created the object, in the same event we need to apply a few more actions to it. First of all, in this event, right-click under the Skid Mark active and select: Order > Bring to back.
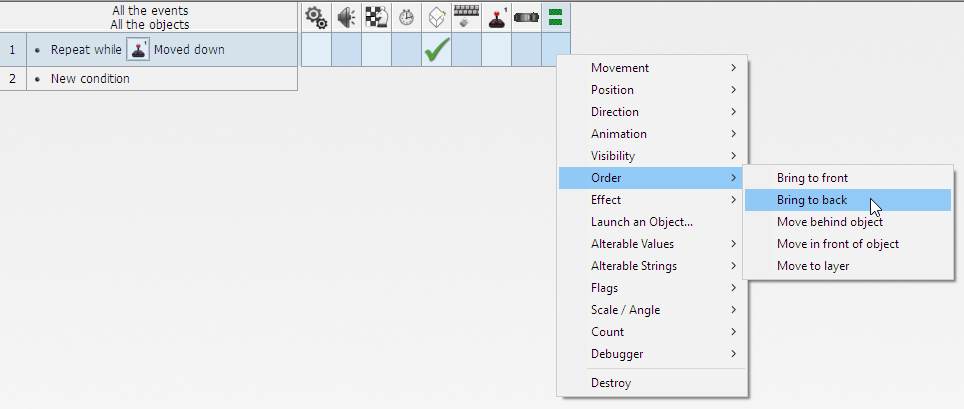
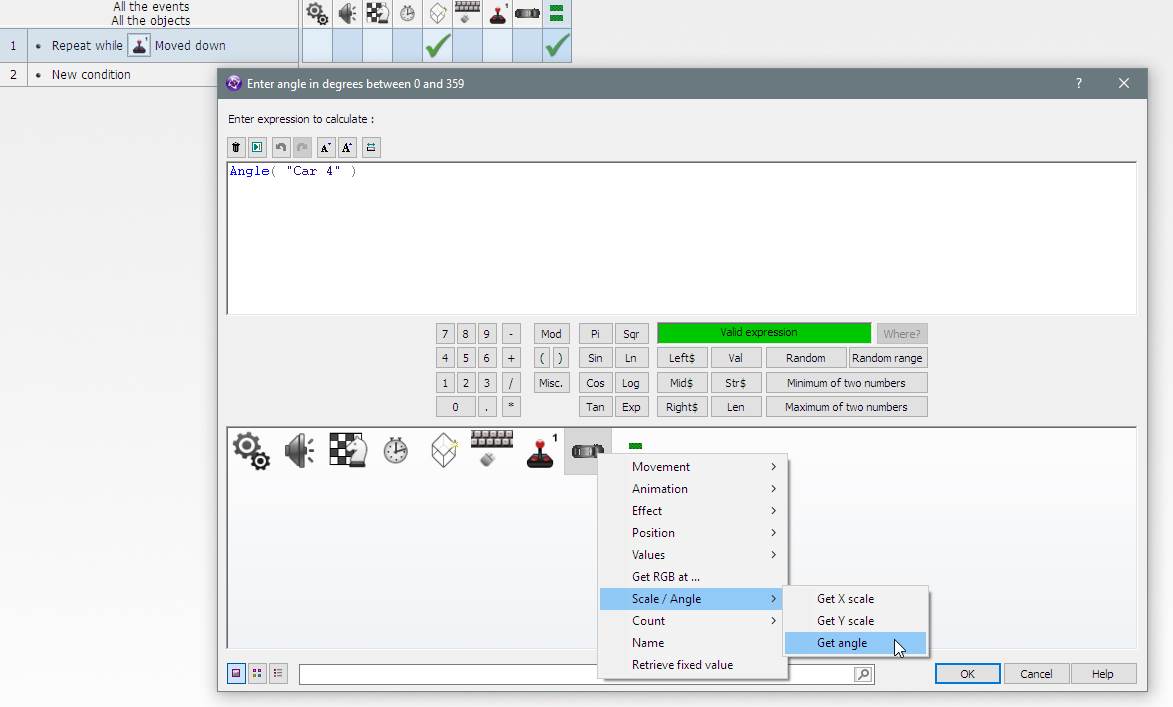
This will ensure the Skid Mark object is created underneath the car and doesn’t show up on top of the car. The next thing we need to do is rotate the object so it’s created at the same angle the car is at, we can do this by right-clicking under the skid mark object and selecting Scale / Angle > Set Angle…
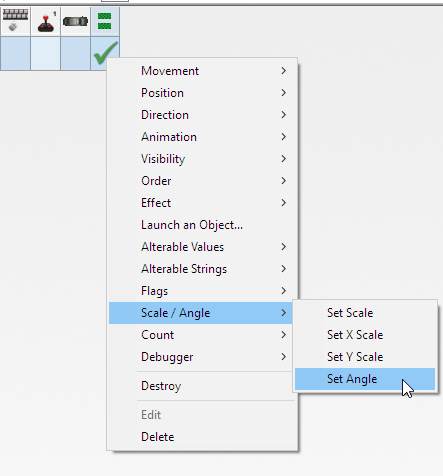
When the expression dialog appears, right-click on the Car and select Scale / Angle > Get Angle…
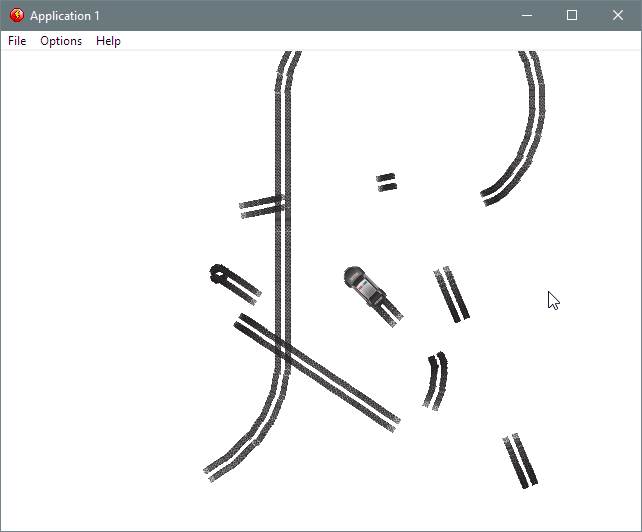
Click OK. Now proceed to test your application. Hit F8 on your keyboard…
When trying out the app, press UP arrow on your keyboard to move the car forward. When you press the DOWN arrow, you will notice it creates skid marks…
Applying some polish
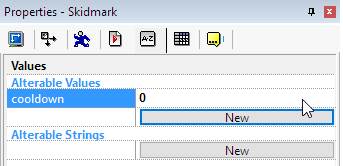
We need to apply some ‘polish’ to this effect for two reasons. One, because at the moment, it looks a bit ‘plain’ and secondly, we need to destroy these skid marks after X amount of time as they are consuming resources that they don’t really need to. So jump back to the Frame Editor, select one the Skid Mark object and create an Alterable Value for it. Let’s call it cooldown. Like so…
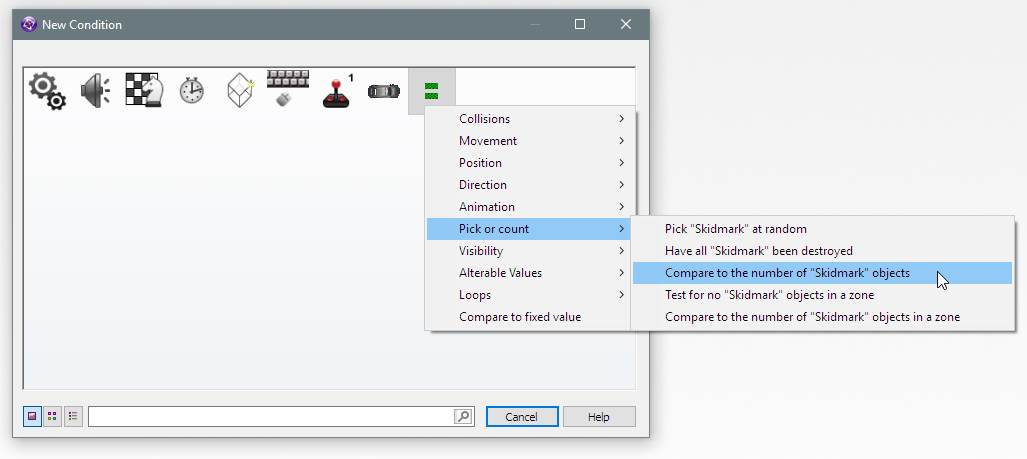
Now jump back into the event editor. Create a new event. Right-click on the Skid Mark object and select Pick or Count > Compare to the number of “skidmark” objects…
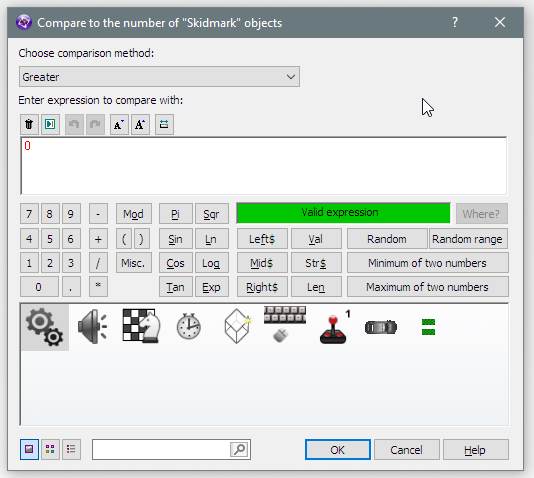
When the expression dialog appears, select GREATER and type in 0…
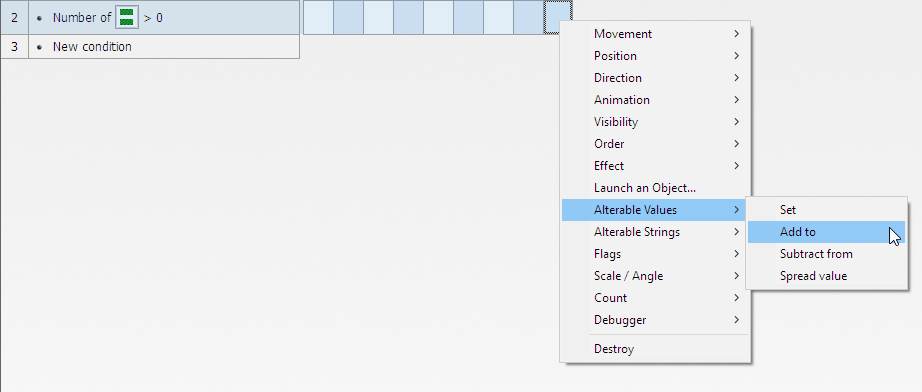
Click OK. Now in this event, right-click under the Skid Mark object and select Alterable Values > Add to…
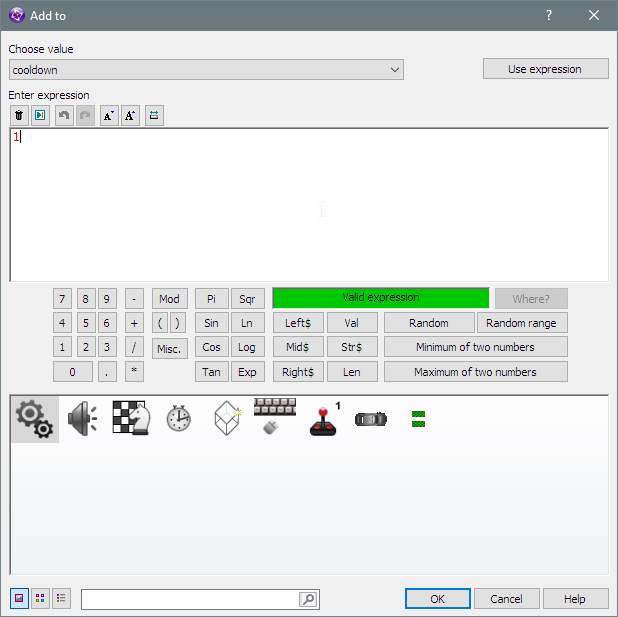
When the dialog pops up, select the cooldown value and type 1 in the expression and click OK…
Now in the same event, right-click under the Skid Mark object again and select Effect > Compatibility > Set Semi-Transparency…
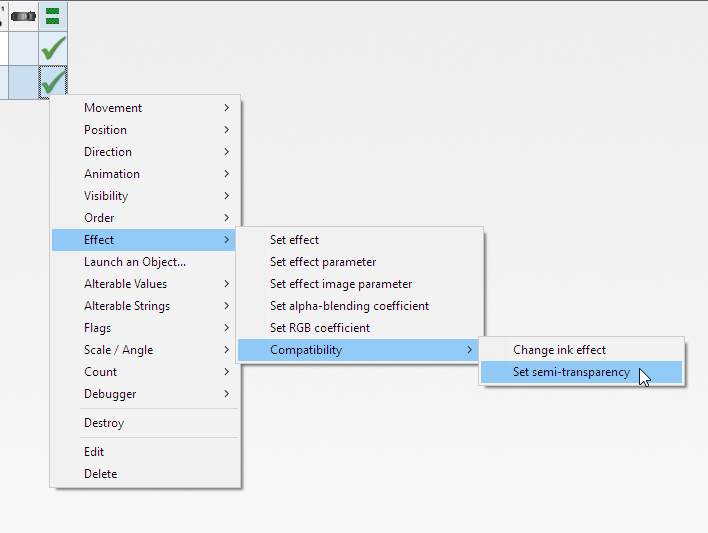
When the expression dialog appears, right-click on the skid mark object and select Values > Values A to M > Retrieve Cooldown…
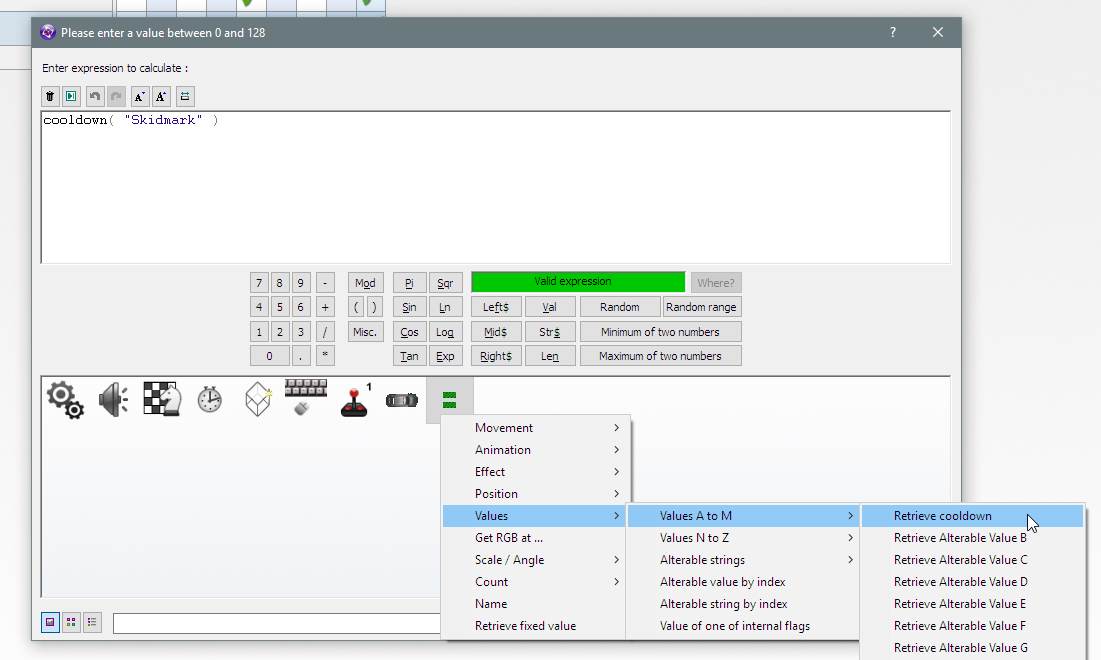
This will retrieve the current cooldown number (which we add 1 to every frame loop) and will effectively ‘Fade’ the skidmark away. Now for one final event.
Create a new event this time, insert a new condition (new event), right-click on the Skidmark and select Alterable Values > Compare to an alterable value. When the expression dialog appears, ensure Cooldown is the value selected and then select ‘GREATER OR EQUAL’ and type in 128…
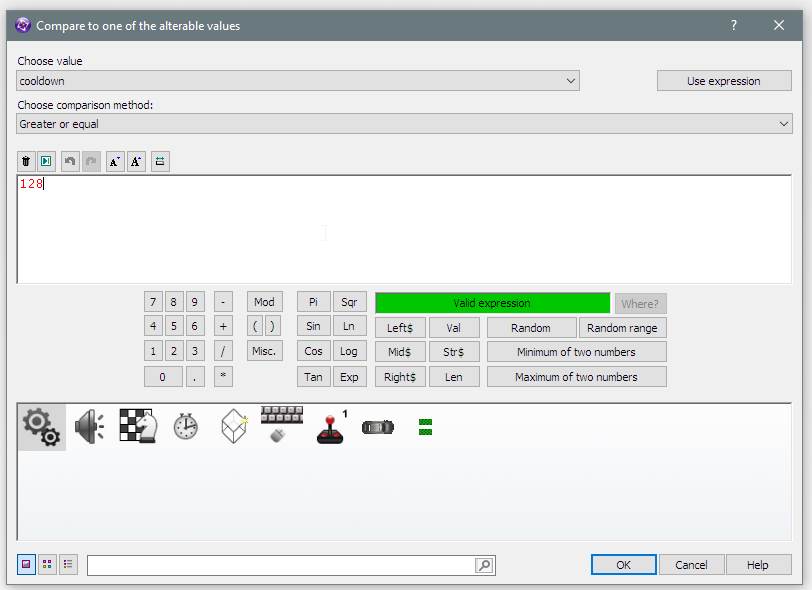
Click OK. Now we stipulated 128 here because the maximum fade value of semi-transparency is 128, so the object will be completely invisible by this point. We may aswell destroy it. Simply right-click under the skidmark on this event and select Destroy.
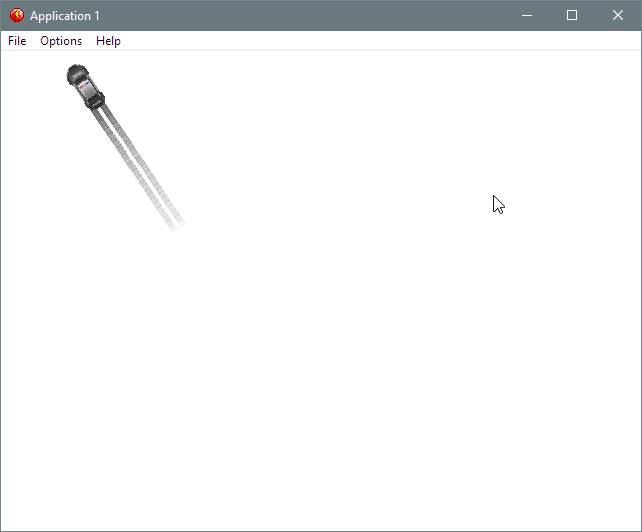
Of course, if you want to see a longer trail, just change the deceleration in the movement properties of the car to about 25 (or lower) for a longer stop.
Join the Academy Today

One Response
Nice little tutorial and a better of doing gradual fade compared to what I currently do. Any thoughts on doing more advanced tutorials regarding car movement? Sliding etc.